
Here’s a complete step-by-step guide to set up Dynamics 365 (Dataverse) integration with SharePoint Online, including configuration, permissions, and validation — perfect for both production and sandbox environments.
Overview
Integrating Dynamics 365 with SharePoint allows you to:
- Store documents in SharePoint while managing them from Dynamics 365.
- Leverage SharePoint’s document management features (versioning, check-in/out, sharing).
- Reduce storage costs in Dataverse (since SharePoint handles file storage).
Prerequisites
Before starting, ensure the following:
- Dynamics 365 Online and SharePoint Online are in the same Microsoft 365 tenant.
- You have System Administrator role in Dynamics 365.
- You have Site Collection Administrator access to the target SharePoint site.
- The user email IDs in Dynamics and SharePoint are the same (for seamless authentication).
- Microsoft 365 integration settings are not blocked by tenant policies.
Step-by-Step Setup
Step 1: Create or Identify a SharePoint Site
- Go to your SharePoint Admin Center → Active Sites.
- Either:
- Create a new site (e.g., https://yourtenant.sharepoint.com/sites/D365Docs), or
- Use an existing site dedicated to CRM document storage.
- Ensure the site is accessible to the Dynamics 365 users.
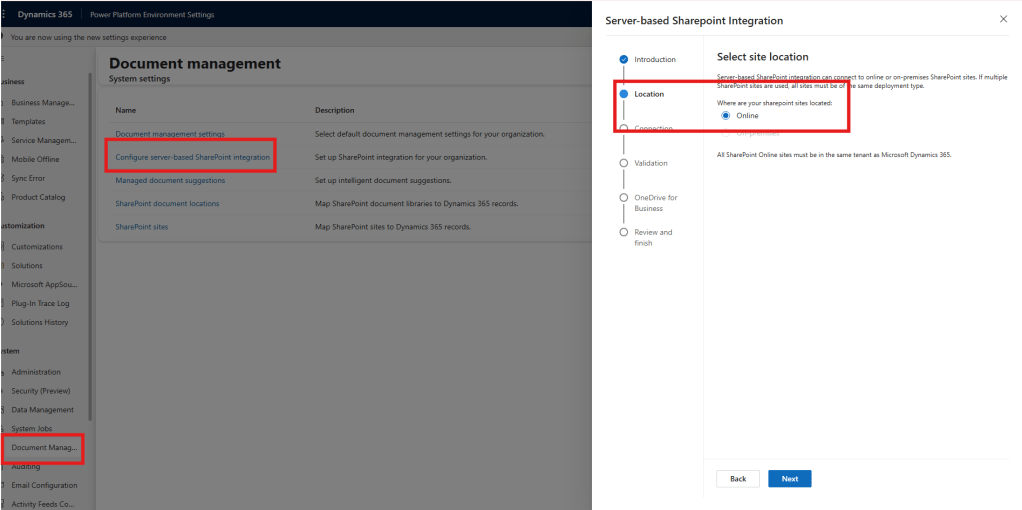
Step 2: Enable Server-Based SharePoint Integration in Dynamics 365
- In Dynamics 365, go to:
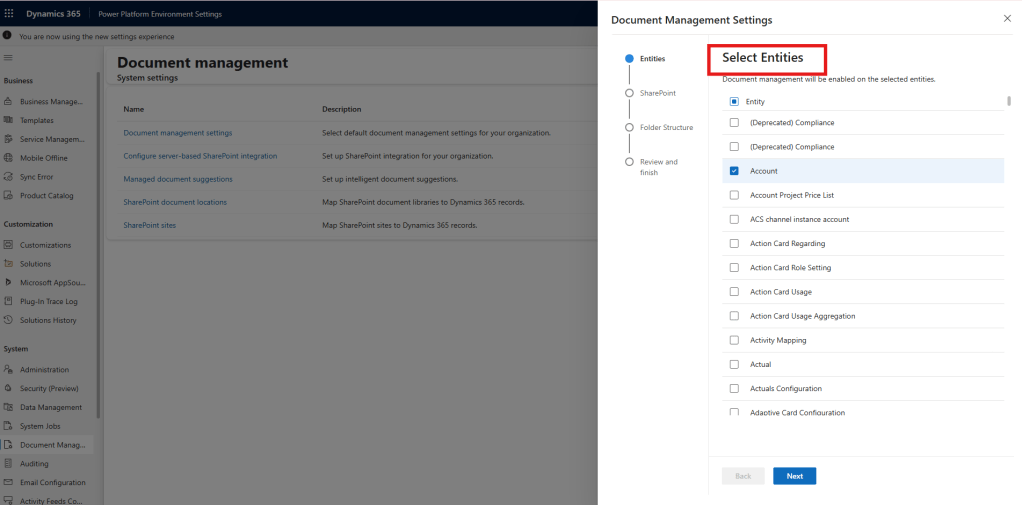
- Settings → Document Management → Document Management Settings
(If you’re using the modern UI: Advanced Settings → Settings → Document Management)

Select the entities you want to enable document management for (e.g., Account, Contact, Opportunity, Case).
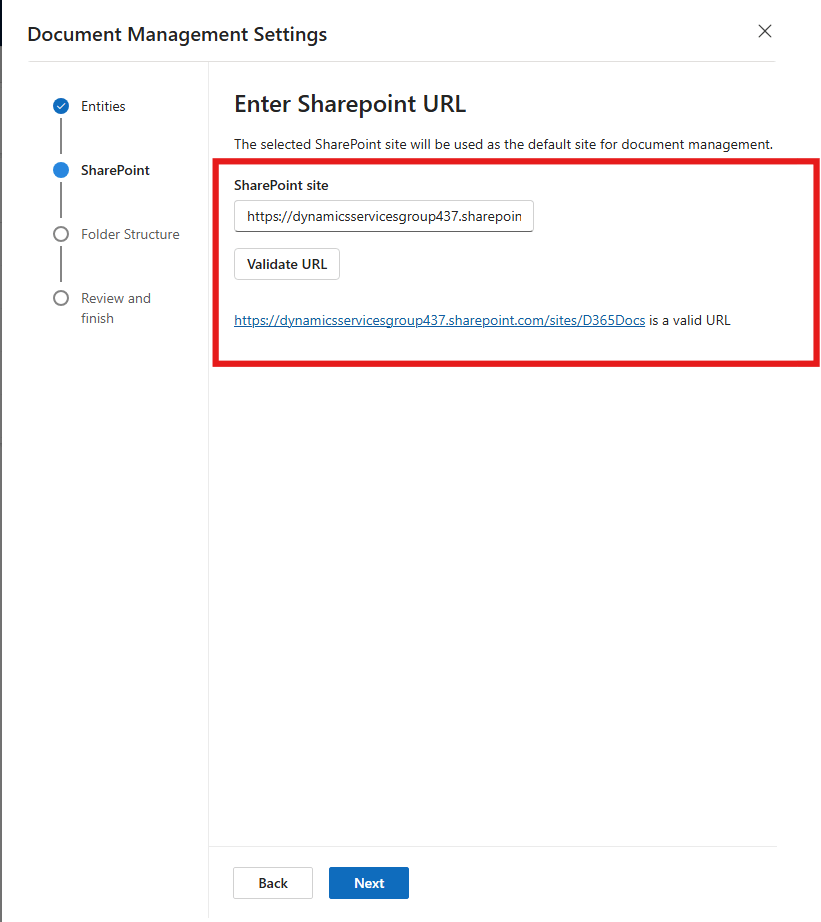
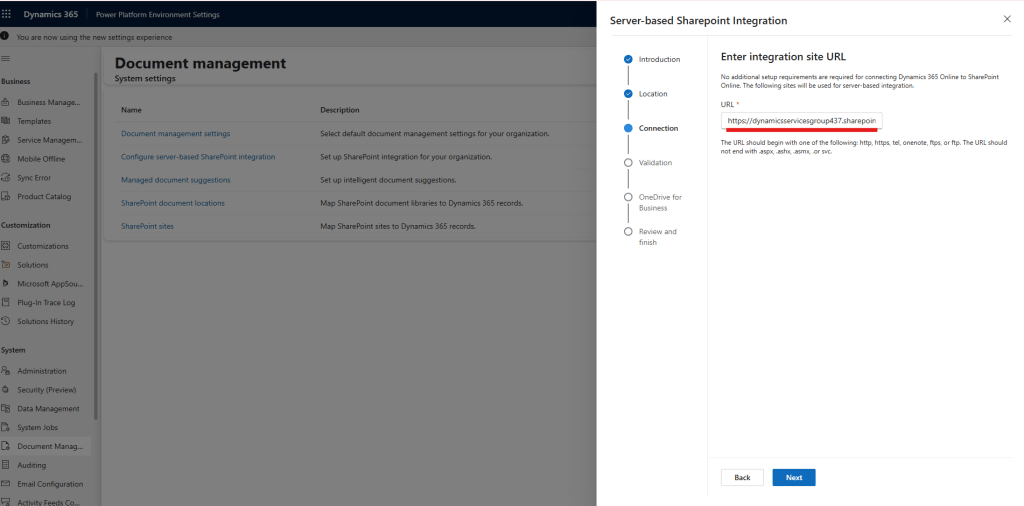
Enter your SharePoint site URL, e.g.:
https://yourtenant.sharepoint.com/sites/D365Docs
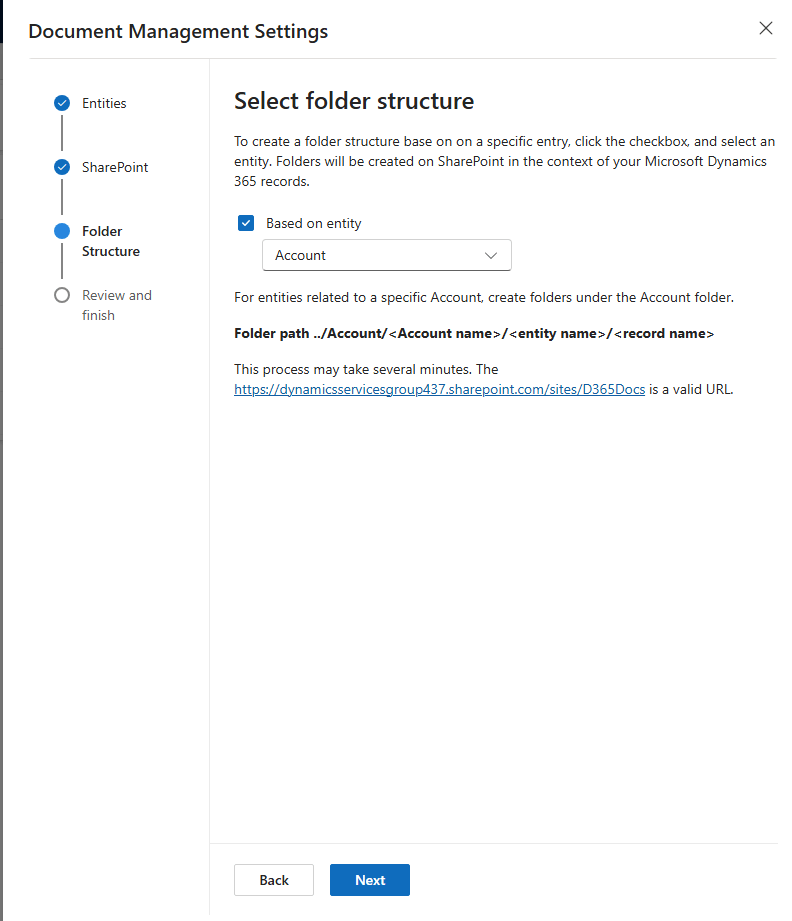
Select Folder Structure
- Click Enable Server-Based SharePoint Integration.
- Choose:
- Online → for SharePoint Online integration.
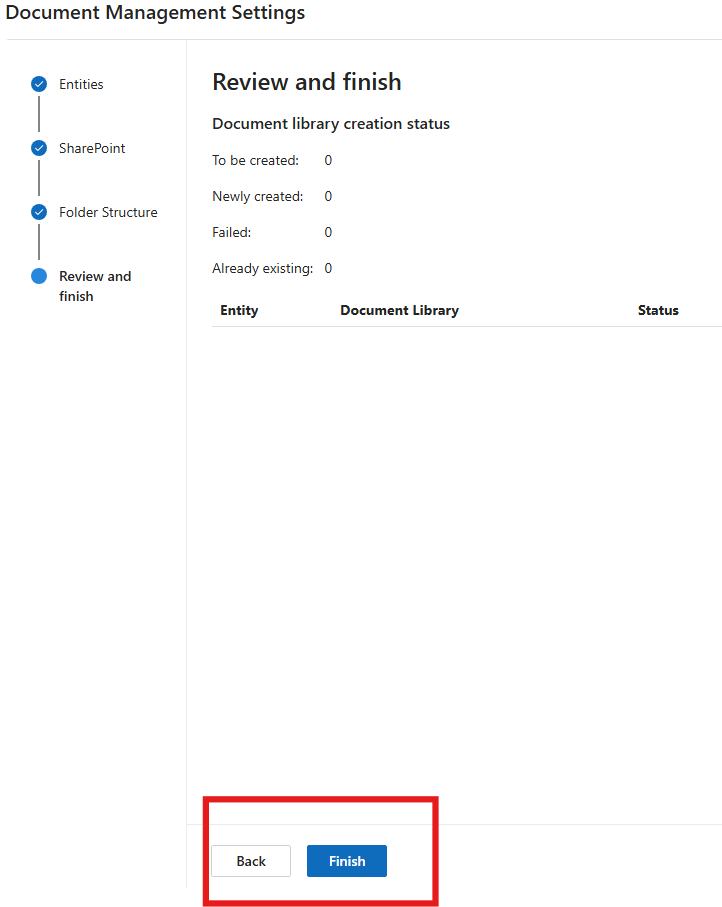
- Click Next, then Enable.
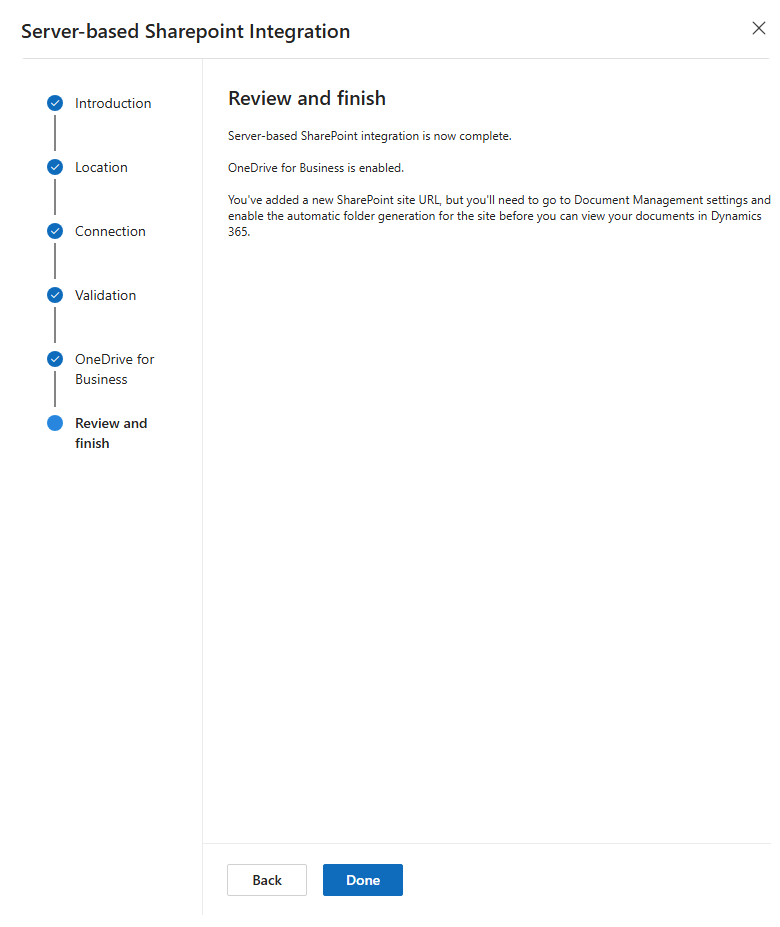
This automatically configures the server-to-server (S2S) authentication between Dynamics 365 and SharePoint.
This creates document locations in SharePoint for each entity automatically when records are created.
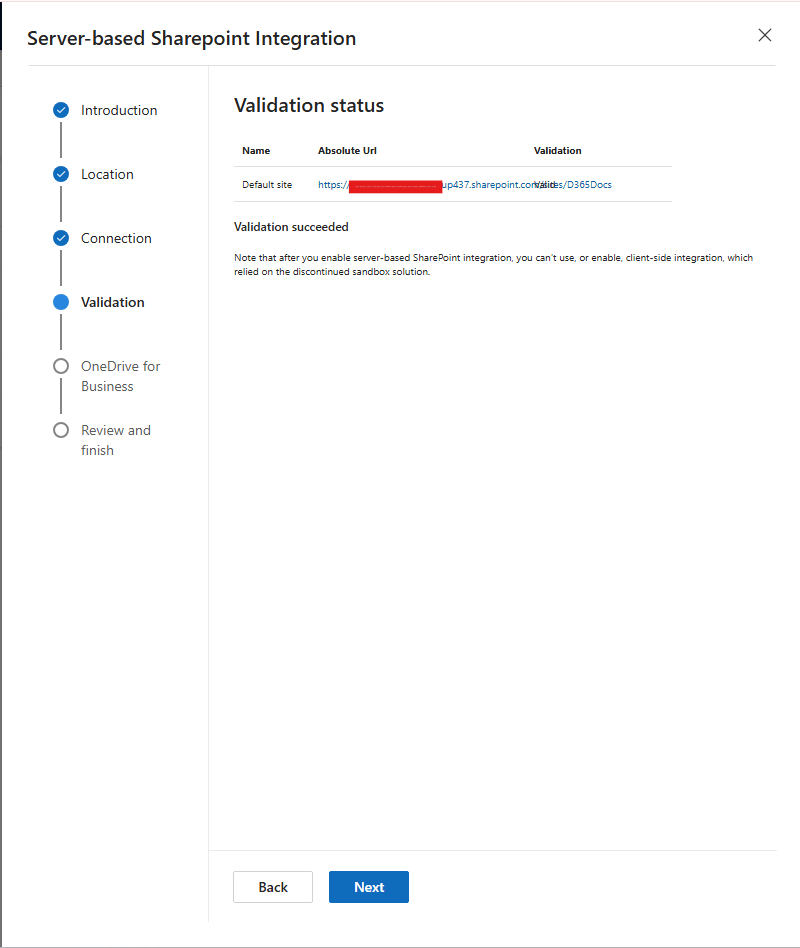
Step 3: Validate the Integration
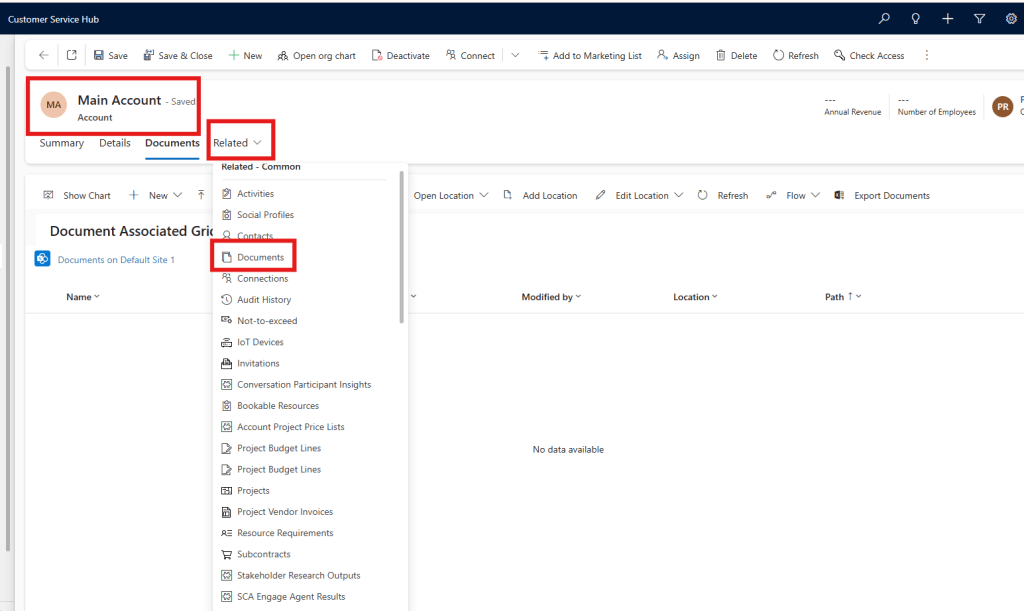
- Open any enabled entity record (e.g., an Account).
- Go to the Documents tab (or Related → Documents).
- Click Documents.
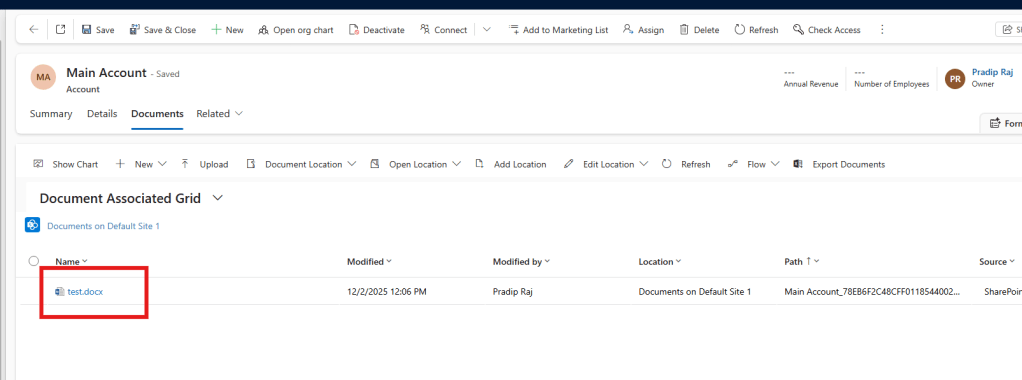
- Dynamics will automatically create a folder in SharePoint:
- /sites/D365Docs/Account/<Account Name>/
- You can now upload, open, or manage documents directly from Dynamics 365.
Step 4: Adjust Permissions (Optional but Recommended)
By default, Dynamics 365 doesn’t enforce SharePoint permissions automatically.
If your organization requires secure access (to avoid data leakage):
Option A – Manually Configure Permissions
- Create SharePoint groups (e.g., CRM Users, CRM Managers).
- Assign access per folder or document library.
Option B – Use a Security Synchronization Tool
Use a third-party tool or custom solution like:
- Microsoft Power Automate Flow to mirror D365 security.
- Attach2Dynamics or CB Dynamics 365 to SharePoint Permissions Replicator to auto-sync permissions.
Step 5: Enable Document Management for Custom Entities (Optional)
- Go to:
- Settings → Document Management → Document Management Settings
- Select your custom entity and enable document management.
- You can customize the folder structure using the Document Management Folder Structure options.
Step 6: Verify in SharePoint
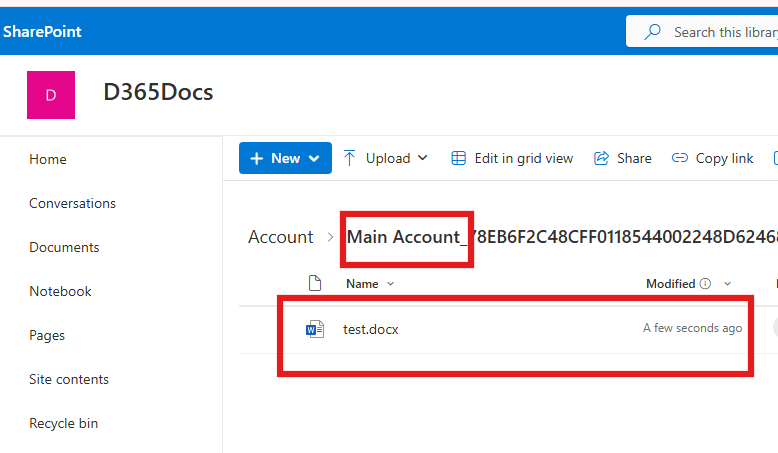
Go to the SharePoint site:
- Navigate to the Document Library → You’ll see folders created for entities.
- Verify document structure and permissions.
- Confirm that uploading from Dynamics appears in SharePoint instantly.
(Optional) Customize Folder Structure
You can customize the folder naming convention:
- Navigate to:
- Settings → Document Management → Document Management Settings → Folder Structure
- You can define naming rules like:
- Account → /{AccountName}
- Opportunity → /{AccountName}/{OpportunityName}
Step 7: Integrate Deeper (Optional Enhancements)
Once basic integration is complete, you can extend functionality:
| Enhancement | Description |
| Attach2Dynamics / SharePoint Integration PCF | Adds advanced document features (preview, upload, metadata tagging). |
| Power Automate Integration | Automate SharePoint workflows on file upload or approval. |
| Power Pages Integration | Allow external users to upload/view documents securely. |
| Dataverse + SharePoint REST API | Build custom file experiences in model-driven apps. |
Troubleshooting Tips
| Issue | Cause | Resolution |
| “URL is invalid” error | Wrong SharePoint site URL | Use root site or correct path format (https://tenant.sharepoint.com/sites/…) |
| “Insufficient permissions” | User not added to SharePoint site | Add the user to the site with at least Edit permission |
| “Documents not loading” | Browser mixed content or blocked cookies | Enable third-party cookies for Dynamics domain |
| “Document location not created” | Entity not enabled for document management | Enable via Document Management Settings |
Summary
| Step | Description |
| 1 | Create/choose SharePoint site |
| 2 | Enable server-based integration |
| 3 | Configure document management settings |
| 4 | Test and validate integration |
| 5 | Adjust permissions |
| 6 | Enable custom entities (optional) |
| 7 | Verify in SharePoint |
| 8 | Extend with Power Automate or PCF (optional) |

Leave a comment