
Introduction:
In today’s fast-paced digital economy, technology-forward industries increasingly rely on automation to streamline operations and drive efficiency.
Sectors such as finance, retail, manufacturing, and other digitally-driven businesses commonly leverage tools like Microsoft Power Automate (Power Automate is used across various industries for automating workflows and integrating applications) to generate crucial documents like invoices, reports, and contracts.
By automating these processes, they can ensure documents are created, stored, and sent without manual intervention, significantly boosting productivity and reducing the margin for error.
This blog post will guide you through setting up a Power Automate flow to perform this conversion. We’ll explore practical use cases, how to leverage dynamic content, and how you can integrate this feature into your existing workflows. Plus, we’ll show you how to overcome common challenges like handling fonts, images, and custom formatting within your PDFs.
We have divided the blog into smaller parts to address the common questions that arise. The common questions are:
how can we use power automate to
- Create a simple PDF with HTML
- Add any logo/Image to PDF with HTML
- Add page break to PDF with HTML
- Add header and footer to PDF with HTML
And also, we will talk about the limitations of this approach.
Part 1: Create a simple PDF with HTML
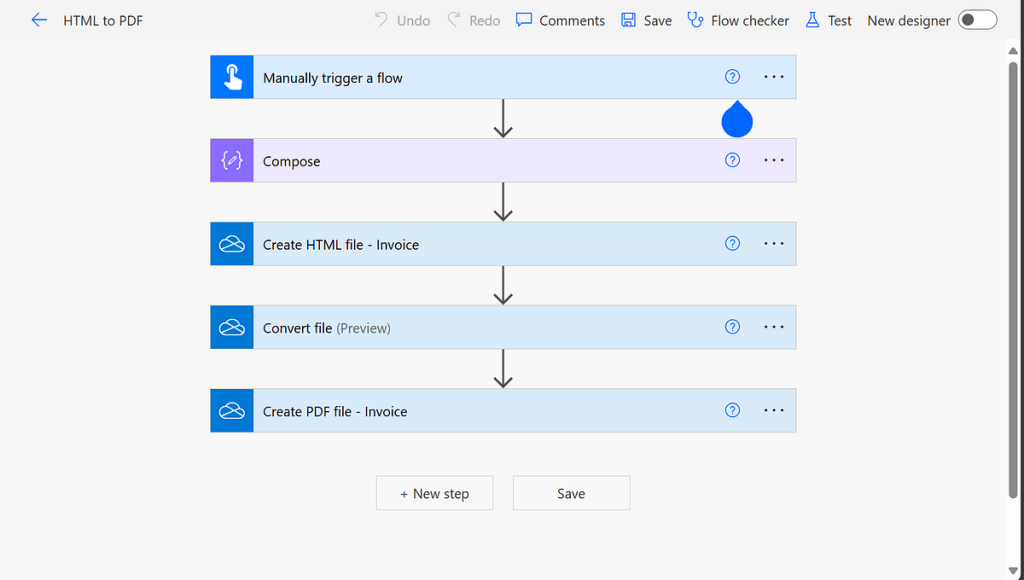
As we can see in the above image, we have one compose action to store the HTML string(file content), and then we save the HTML content to a file with the “create file” action from one drive, we can store that HTML file wherever we want (e.g., SharePoint, etc. ). Now we convert the HTML to PDF with the “Convert File” action from one drive and one manual trigger for testing purposes.
Input: (HTML code)
<!DOCTYPE html>
<html lang="en">
<head>
    <meta charset="UTF-8">
    <meta name="viewport" content="width=device-width, initial-scale=1.0">
    <title>Company Invoice</title>
    <style>
        body {
            font-family: Arial, sans-serif;
            margin: 20px;
            padding: 0;
            color: #333;
        }
        .invoice-box {
            max-width: 800px;
            margin: auto;
            padding: 30px;
            border: 1px solid #eee;
            box-shadow: 0 0 10px rgba(0, 0, 0, 0.15);
            font-size: 16px;
            line-height: 24px;
            color: #555;
        }
        .invoice-box table {
            width: 100%;
            line-height: inherit;
            text-align: left;
        }
        .invoice-box table td {
            padding: 5px;
            vertical-align: top;
        }
        .invoice-box table tr td:nth-child(2) {
            text-align: right;
        }
        .invoice-box table tr.top table td {
            padding-bottom: 20px;
        }
        .invoice-box table tr.top table td.title {
            font-size: 45px;
            line-height: 45px;
            color: #333;
        }
        .invoice-box table tr.information table td {
            padding-bottom: 40px;
        }
        .invoice-box table tr.heading td {
            background: #eee;
            border-bottom: 1px solid #ddd;
            font-weight: bold;
        }
        .invoice-box table tr.details td {
            padding-bottom: 20px;
        }
        .invoice-box table tr.item td {
            border-bottom: 1px solid #eee;
        }
        .invoice-box table tr.item.last td {
            border-bottom: none;
        }
        .invoice-box table tr.total td:nth-child(2) {
            border-top: 2px solid #eee;
            font-weight: bold;
        }
    </style>
</head>
<body>
    <div class="invoice-box">
        <table cellpadding="0" cellspacing="0">
            <tr class="top">
                <td colspan="2">
                    <table>
                        <tr>
                            <td class="title">
                                <h2>Company Name</h2>
                            </td>
                            <td>
                                Invoice #: 123<br>
                                Created: August 28, 2024<br>
                                Due: September 5, 2024
                            </td>
                        </tr>
                    </table>
                </td>
            </tr>
            <tr class="information">
                <td colspan="2">
                    <table>
                        <tr>
                            <td>
                                Your Company Name<br>
                                123 Street Name<br>
                                City, State, ZIP
                            </td>
                            <td>
                                Client Name<br>
                                Client Company<br>
                                456 Another Street, City, State, ZIP
                            </td>
                        </tr>
                    </table>
                </td>
            </tr>
            <tr class="heading">
                <td>Payment Method</td>
                <td>Check #</td>
            </tr>
            <tr class="details">
                <td>Credit Card</td>
                <td>1001</td>
            </tr>
            <tr class="heading">
                <td>Item</td>
                <td>Price</td>
            </tr>
            <tr class="item">
                <td>Service 1</td>
                <td>$300.00</td>
            </tr>
            <tr class="item">
                <td>Service 2</td>
                <td>$150.00</td>
            </tr>
            <tr class="item last">
                <td>Service 3</td>
                <td>$50.00</td>
            </tr>
            <tr class="total">
                <td></td>
                <td>Total: $500.00</td>
            </tr>
        </table>
    </div>
</body>

</html>
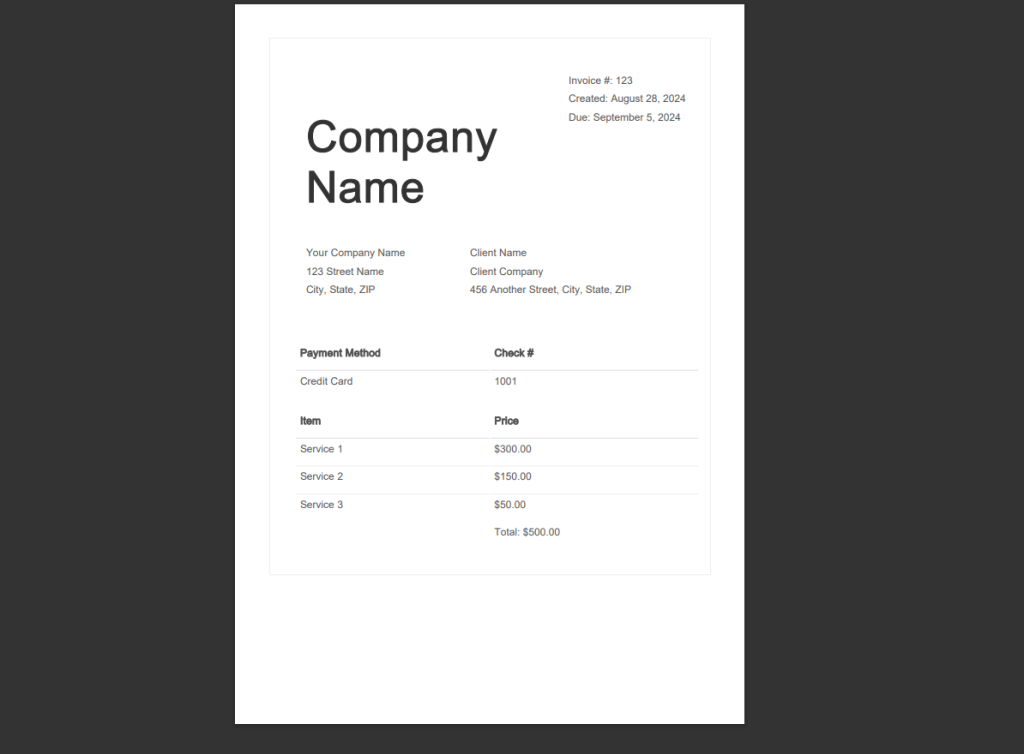
Output: (PDF File)
Part 2: Add a Logo/Image to PDF with HTML
For adding any logo or image we can add the below syntax into the HTML.
<img src="data:image/jpg;base64, base64imagestring"
     alt="topic-5-img-1"
/>
The “base64imagestring” is the base64 format of the image we can get that with these two methods:
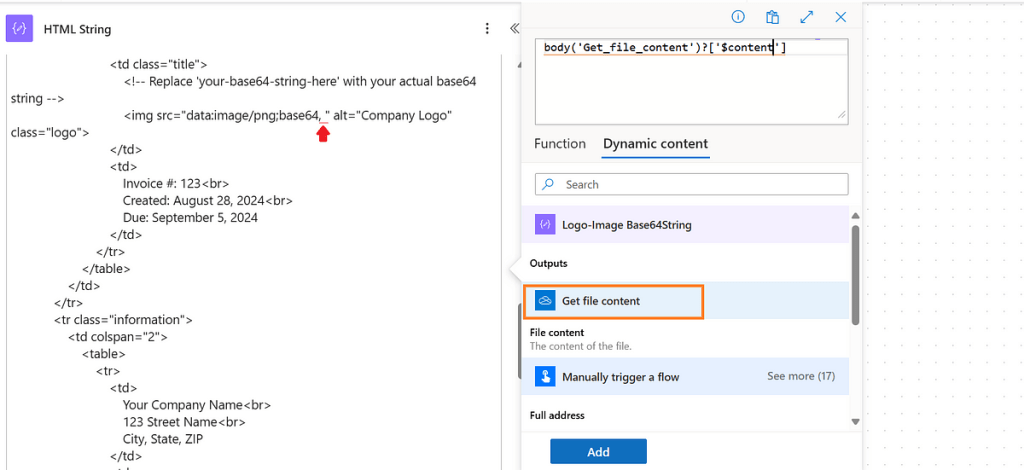
- With get file content:
In this approach we simply store the image in SharePoint or OneDrive and then get the file content with the “Get File Content” action which will provide the base64string (“@{body(‘Get_file_content’)?[‘$content’]}”), we simply add this to HTML text which then converts into PDF.

- Manual:
In the manual approach, we simply find a suitable website that converts the image to base64string. And add a compose action with that data. Just like the above method, we use dynamic content to add the compose text to HTML text, which then will convert into pdf.
These are some websites that will help in converting images to base64 strings.
- Convert Image to Base64 Online | Base64Encoder
- Image to Base64 | Base64 Encode | Base64 Converter | Base64
- Image to Base64 converter to convert Image to Base64 String. (codebeautify.org)
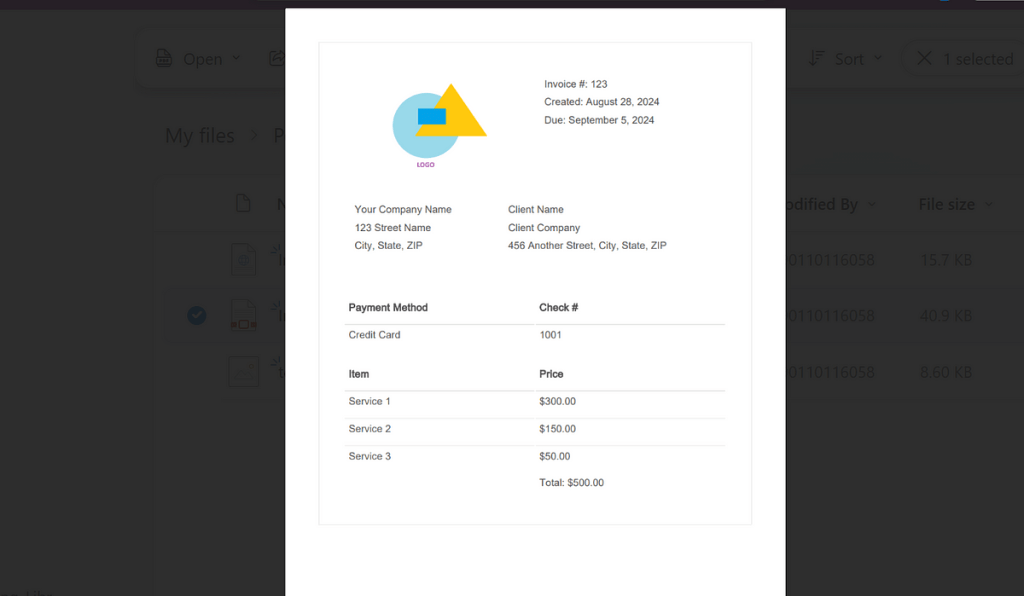
Output:
Part 3: Add a Page break to PDF with HTML
With the below simple style (CSS), we can archive the page break functionality. Now we just need to add this style we want, just add the below code where you want to add a page break in pdf.
// In <style> </style> tag
.page-break {
  page-break-before: always;
}

<!-- In HTML -->
<p class="page-break"> Text </p>
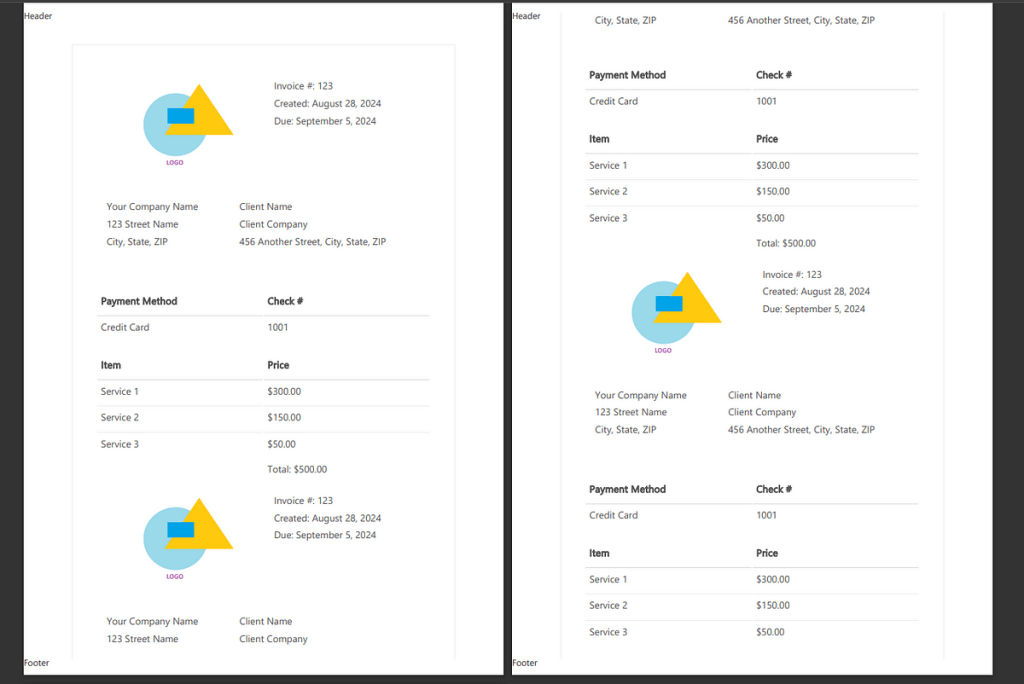
Part 4: Add header and footer to PDF with HTML
Add the header and footer in the pdf with the below code. To align content properly use proper CSS and add page-breaks.
<html>
  <head>
    <meta charset="UTF-8">
    <title>
        Generiertes PDF
    </title>
    <style>
         header {
          position: fixed;
          top: 0;
          width: 100%;
        }

        footer {
          position: fixed;
          top: 100%;
          width: 100%;
       }
    </style>
  </head>
  <body>
  <header> <p> Header </p> </header>
  <div> Your content <div>
  <footer> <p> Footer </p> </footer>
  </body>
</html>
Output:
Limitations:
The main limitation with this approach is the file size issue, the one drive action has a file size limit of 2 MB (As of now), and if it exceeds the size limit we can get the below error:

To resolve this limitation, we can use the premium action (not free). And also we have one article about this topic pay a visit to learn more.
Thanks for reading till the very end, Feel free to ask any questions or queries. We will be more than happy to answer them.

Leave a comment